To configure Special Item Subtotal functionality, complete the steps outlined below.
Go to: File > Sales > Stock Item Attributes
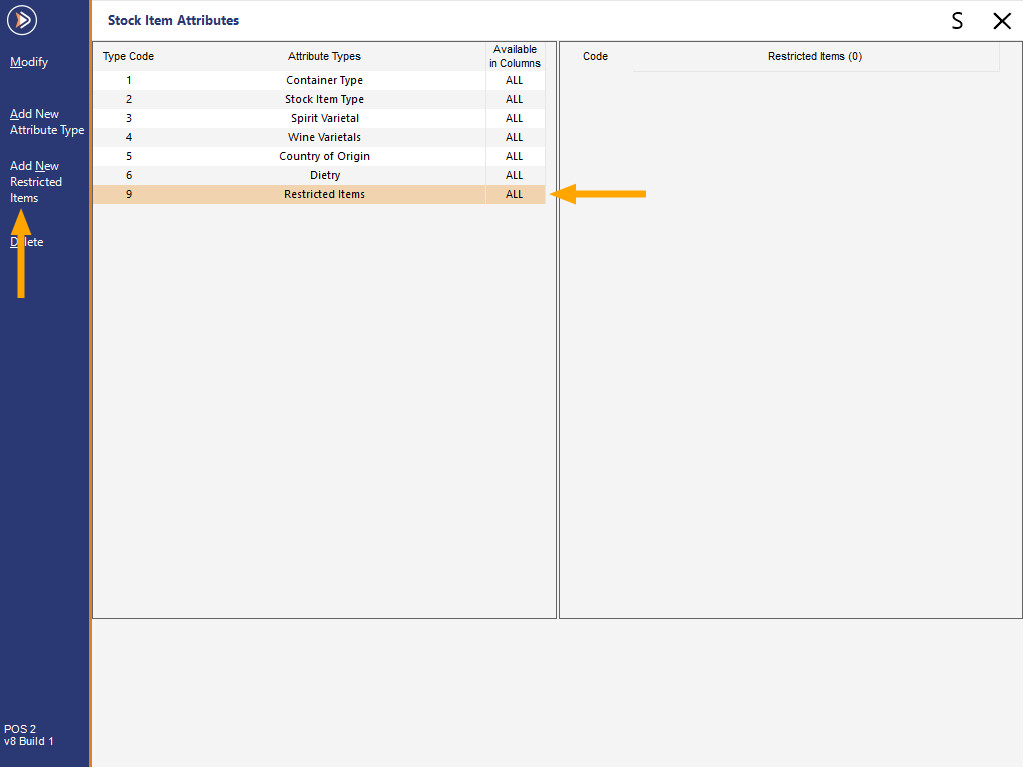
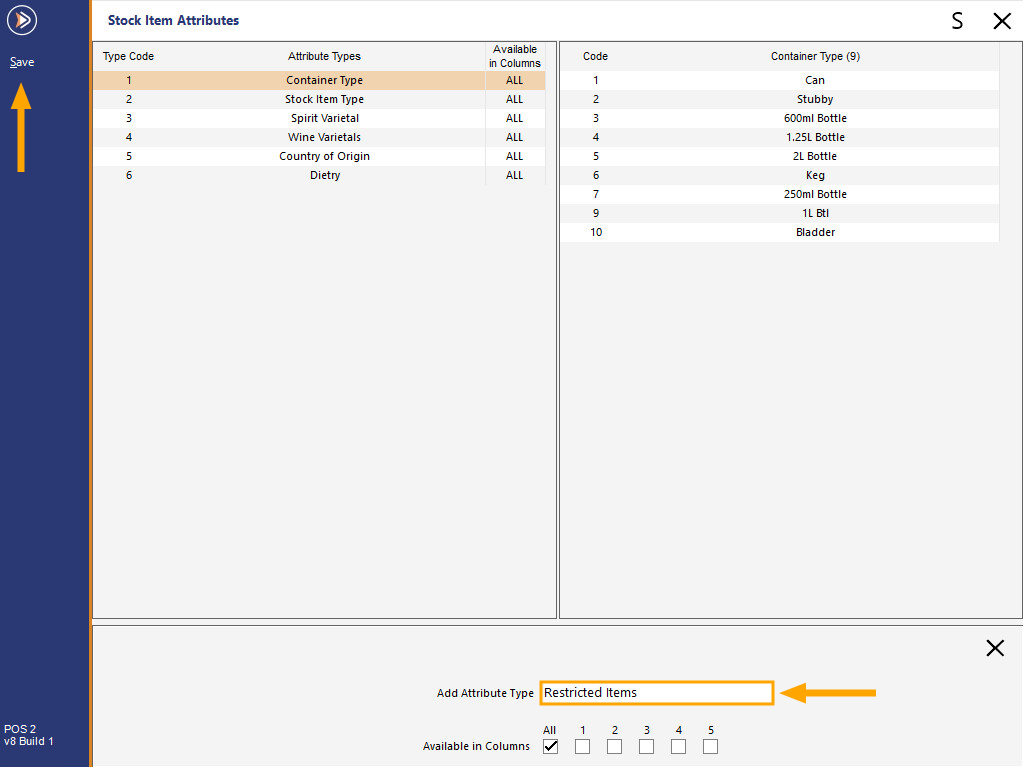
Press the "Add New Attribute Type" button on the top-left corner of the window, enter a name for the Attribute Type then on the top-left corner of the window, press the "Save" button.
For this example, we will enter an Attribute Type name "Restricted Items".
After saving the new Attribute Type, it will be automatically selected on the left-hand side of the window.
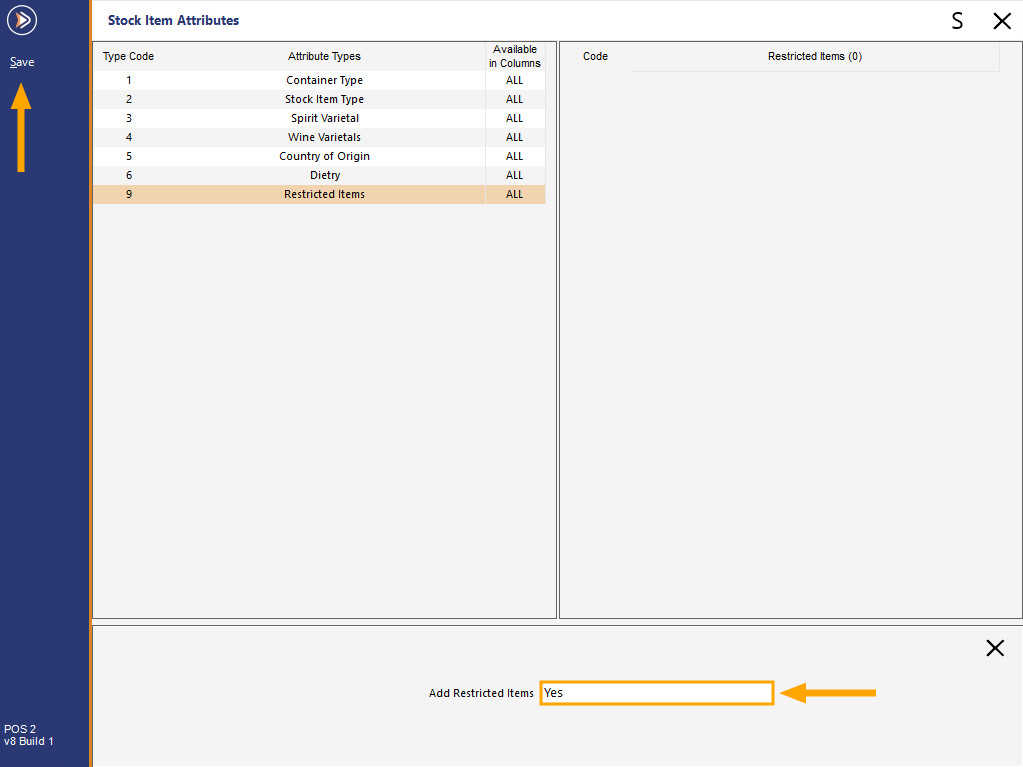
Press the "Add New Restricted Items" button on the top-left corner of the window.
Enter "Yes" into the "Add Restricted Items" field, then press "Save" on the top-left corner of the window.
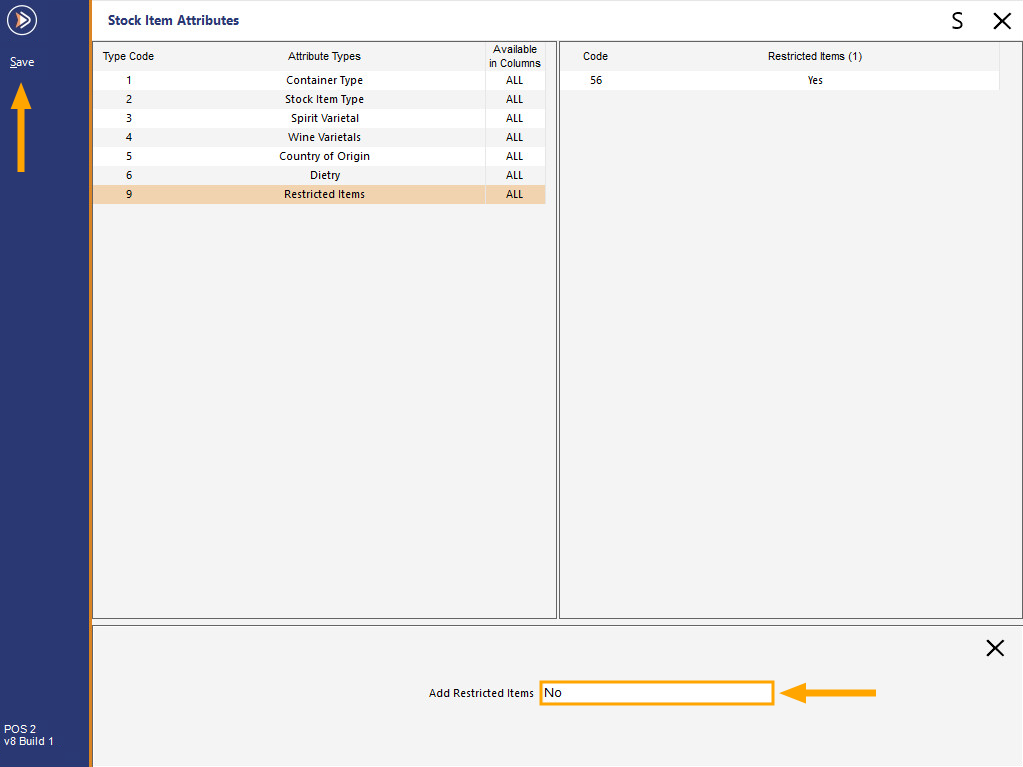
Optional Step - Enter "No" into the "Add Restricted Items" field, then press "Save" on the top-left corner of the window.
By adding the "No" Attribute and assigning items to it (further below), you will have the ability to filter the Stock Items screen based on whether or not Stock Items have restriction enabled.
After saving the Attributes, close the Stock Item Attributes window by pressing the "X" button on the top-right corner of the window.
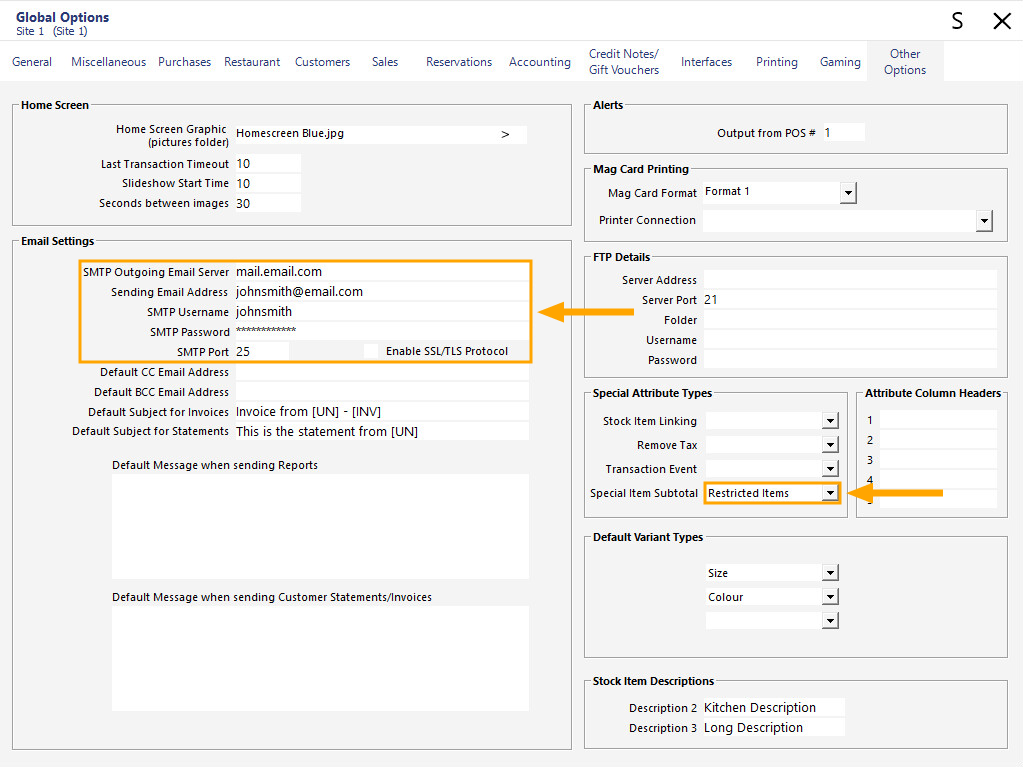
The newly created "Restricted Items" Attribute Type needs to be selected in Global Options.
Go to: Setup > Global Options > Other Options > Special Attribute Types
From the Special Item Subtotal dropdown box, select "Restricted Items" (or select the name entered during the previous step above).
If this function is being configured as part of the PLBPOS Integration, ensure that you configure the email settings.
These settings will be used for emailing logs to Idealpos if there are any communication issues with the Central Platform (DXC Web Server).
The email settings shown below are for demonstration purposes only.
Refer to the company you're receiving your email service from for more details about setting up Email settings.
These are typically similar settings that you'd enter into your email client application to receive emails.
If the PLBPOS Interface is not being used, the Email Settings can be left as blank if they aren't already configured.
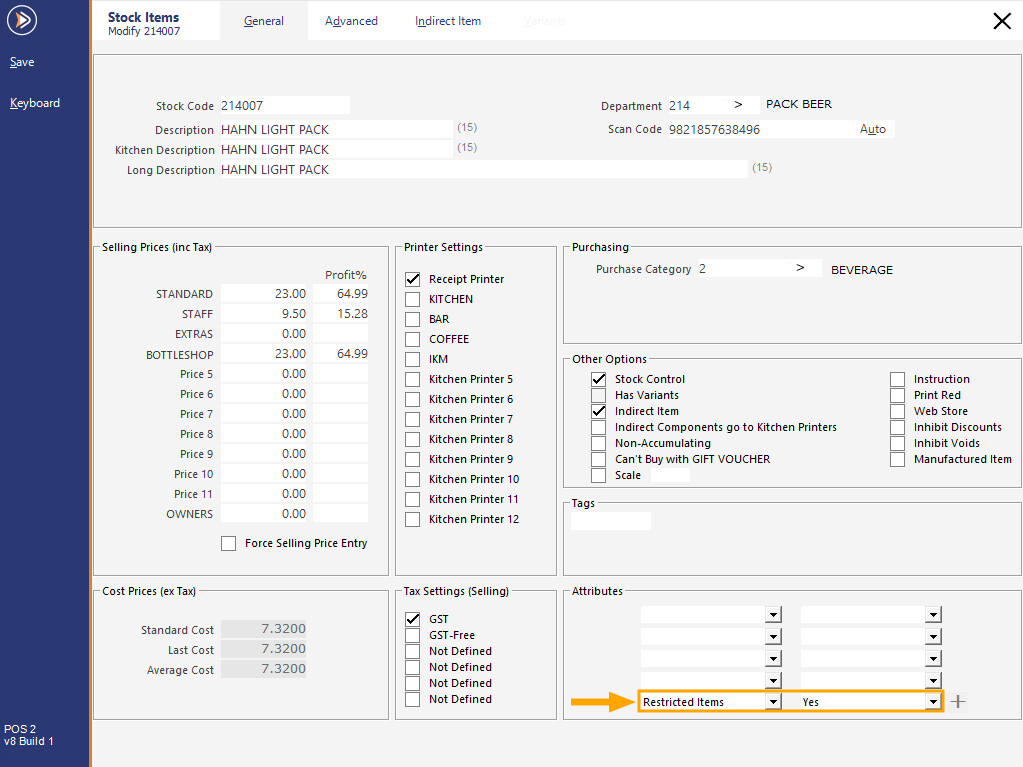
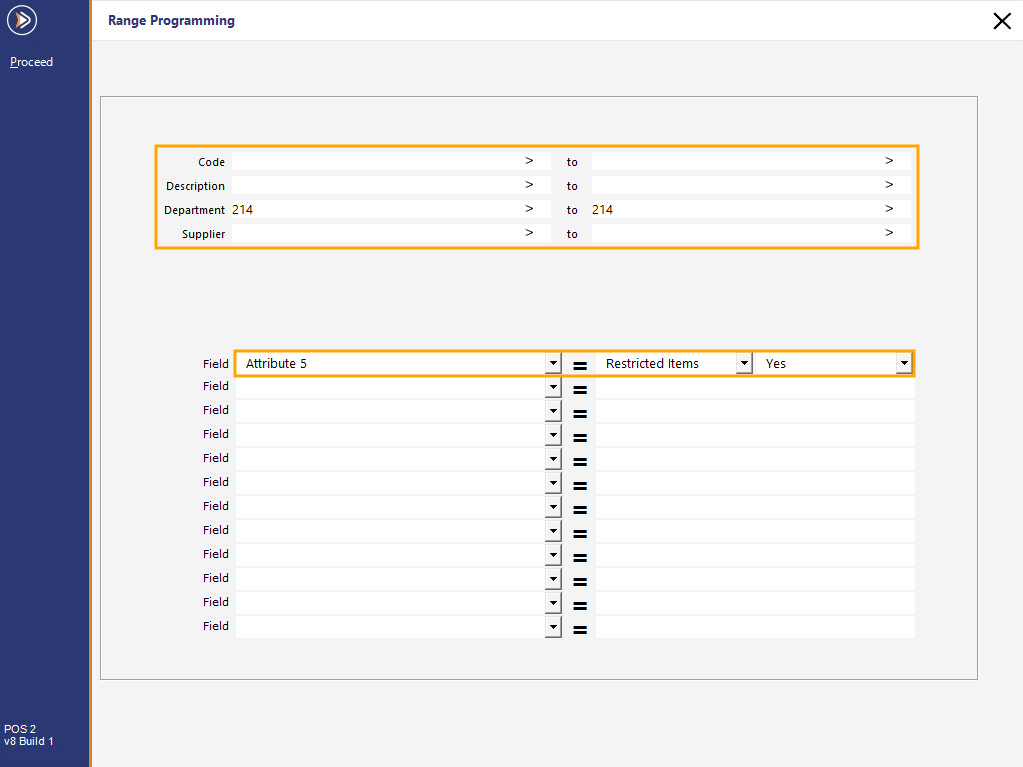
The final step involves assigning the newly created Stock Item Attribute Type and Attribute to all items that you want restricted and included under the separate Subtotal amount when purchased by a Customer.
Depending on the number of Stock Items you need to update, the following options can be used:
This step is optional, however, it is recommended if you want to be able to filter Stock Items based on whether or not they are Restricted Items.
If this functionality is not required, this step can be skipped.
In order to filter the Stock Items screen based on the Restricted Items Attribute Type, you will need to configure an Attribute Column Header in Global Options.
The field for the Attribute Type then needs to be enabled in the Stock Items screen.
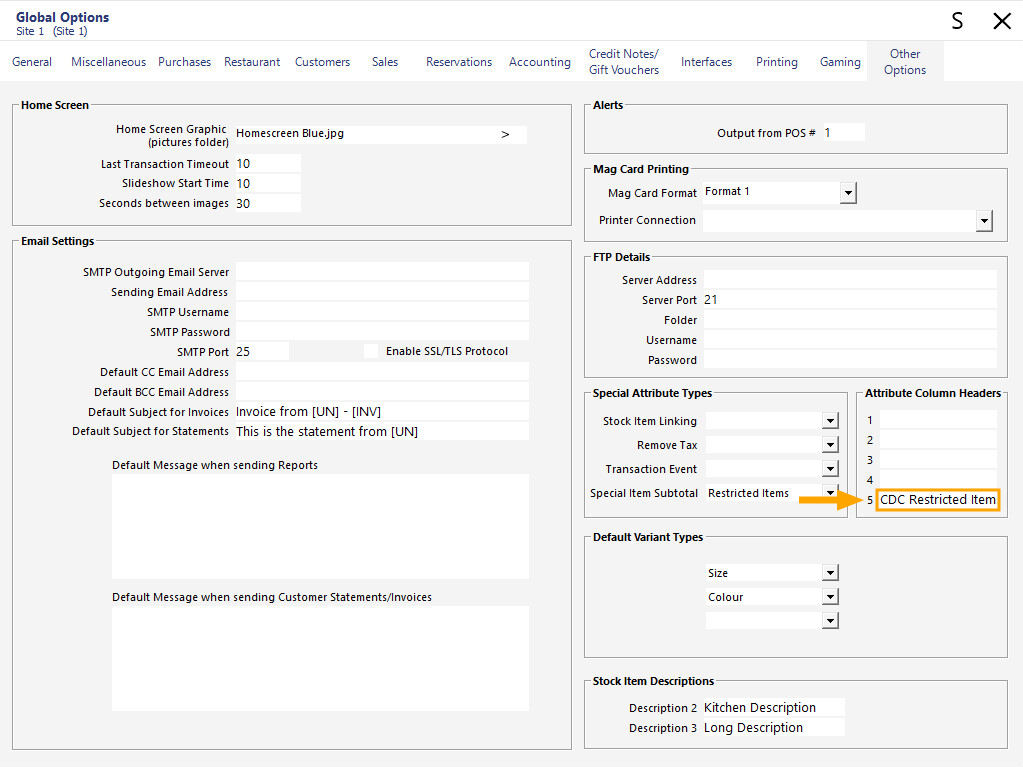
Go to: Setup > Global Options > Other Options > Attribute Column Headers
Each of the Column Headers displayed correspond to an Attribute Slot. Ensure that you set the Column Header number that corresponds to the Attribute Slot number you have used to assign your Restricted Stock Items against.
Select the Attribute Slot, then enter a description for the slot.
You can enter any description you like. The entered description will be displayed at the top of the Stock Items screen above the field that will be used for filtering Restricted Items.
The below example shows a Description/Label entered for Attribute Slot 5, however, your system may vary depending on the Attribute Slot used above:
Close the Global Options window.
Now that the Attribute Slot has been labelled, you will need to enable it on the Stock Items screen.
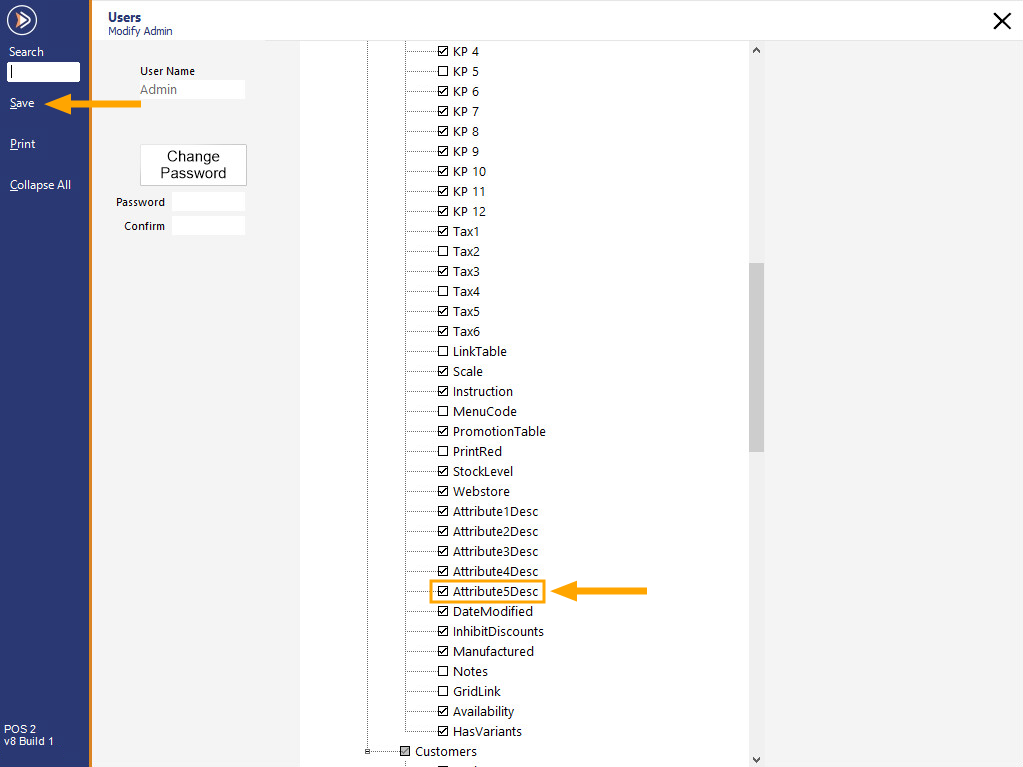
Go to: Setup > Users > Select "Admin" > Modify.
From the tree view, expand File Fields > Stock Items > Enable Checkbox "Attribute#Desc" (Substitute # with the number of the Attribute Slot you've used).
Press "Save" to save the change.
By default, this field in the Stock Items window will appear off the edge of the Stock Items screen (you will need to scroll to the far-right of the Stock Items window to see this field), so you may want to move it across to the left side to allow fast access to this field.
Go to: File > Stock Control > Stock Items
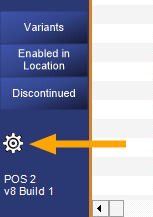
At the bottom-left corner of the Stock Items window, select the cog icon as illustrated below:
After selecting the cog icon, the Stock Items screen will change to an edit mode which can be used to modify the appearance of the screen.
Scroll to the far-right of the Stock Items screen until you find the CDC Restricted Items column. Typically, this will be one of the last columns in the header.
Once the column has been found, select it by clicking on it once, then click on it again and keep holding down on the mouse button while dragging it to your preferred location:
While dragging, two small arrows will appear which will indicate the new position of the column header.
Keep dragging the header until you find a suitable position for it.
Release the mouse button to drop the column header into the new position.
Close the Stock Items window to save the change.
After the above steps have been completed, the function is ready to be used.
Close Idealpos to apply the change.
Go to: Start > Idealpos > IPSUtils > Close.
Once Idealpos has been closed, you may start it again either via the Desktop Shortcut or by going to Start > Idealpos > Idealpos.
For details about using Special Item Subtotal, click here.